Roses are timeless symbols of beauty and romance, admired for their stunning blooms and intoxicating fragrance. If you’ve ever dreamed of cultivating your own rose garden, you’ll be delighted to learn that you can easily grow roses from cuttings right in the comfort of your home. In this guide, we’ll walk you through the process, making it simple and accessible for all aspiring gardeners.
Step 1: Selecting Your Rose Cuttings
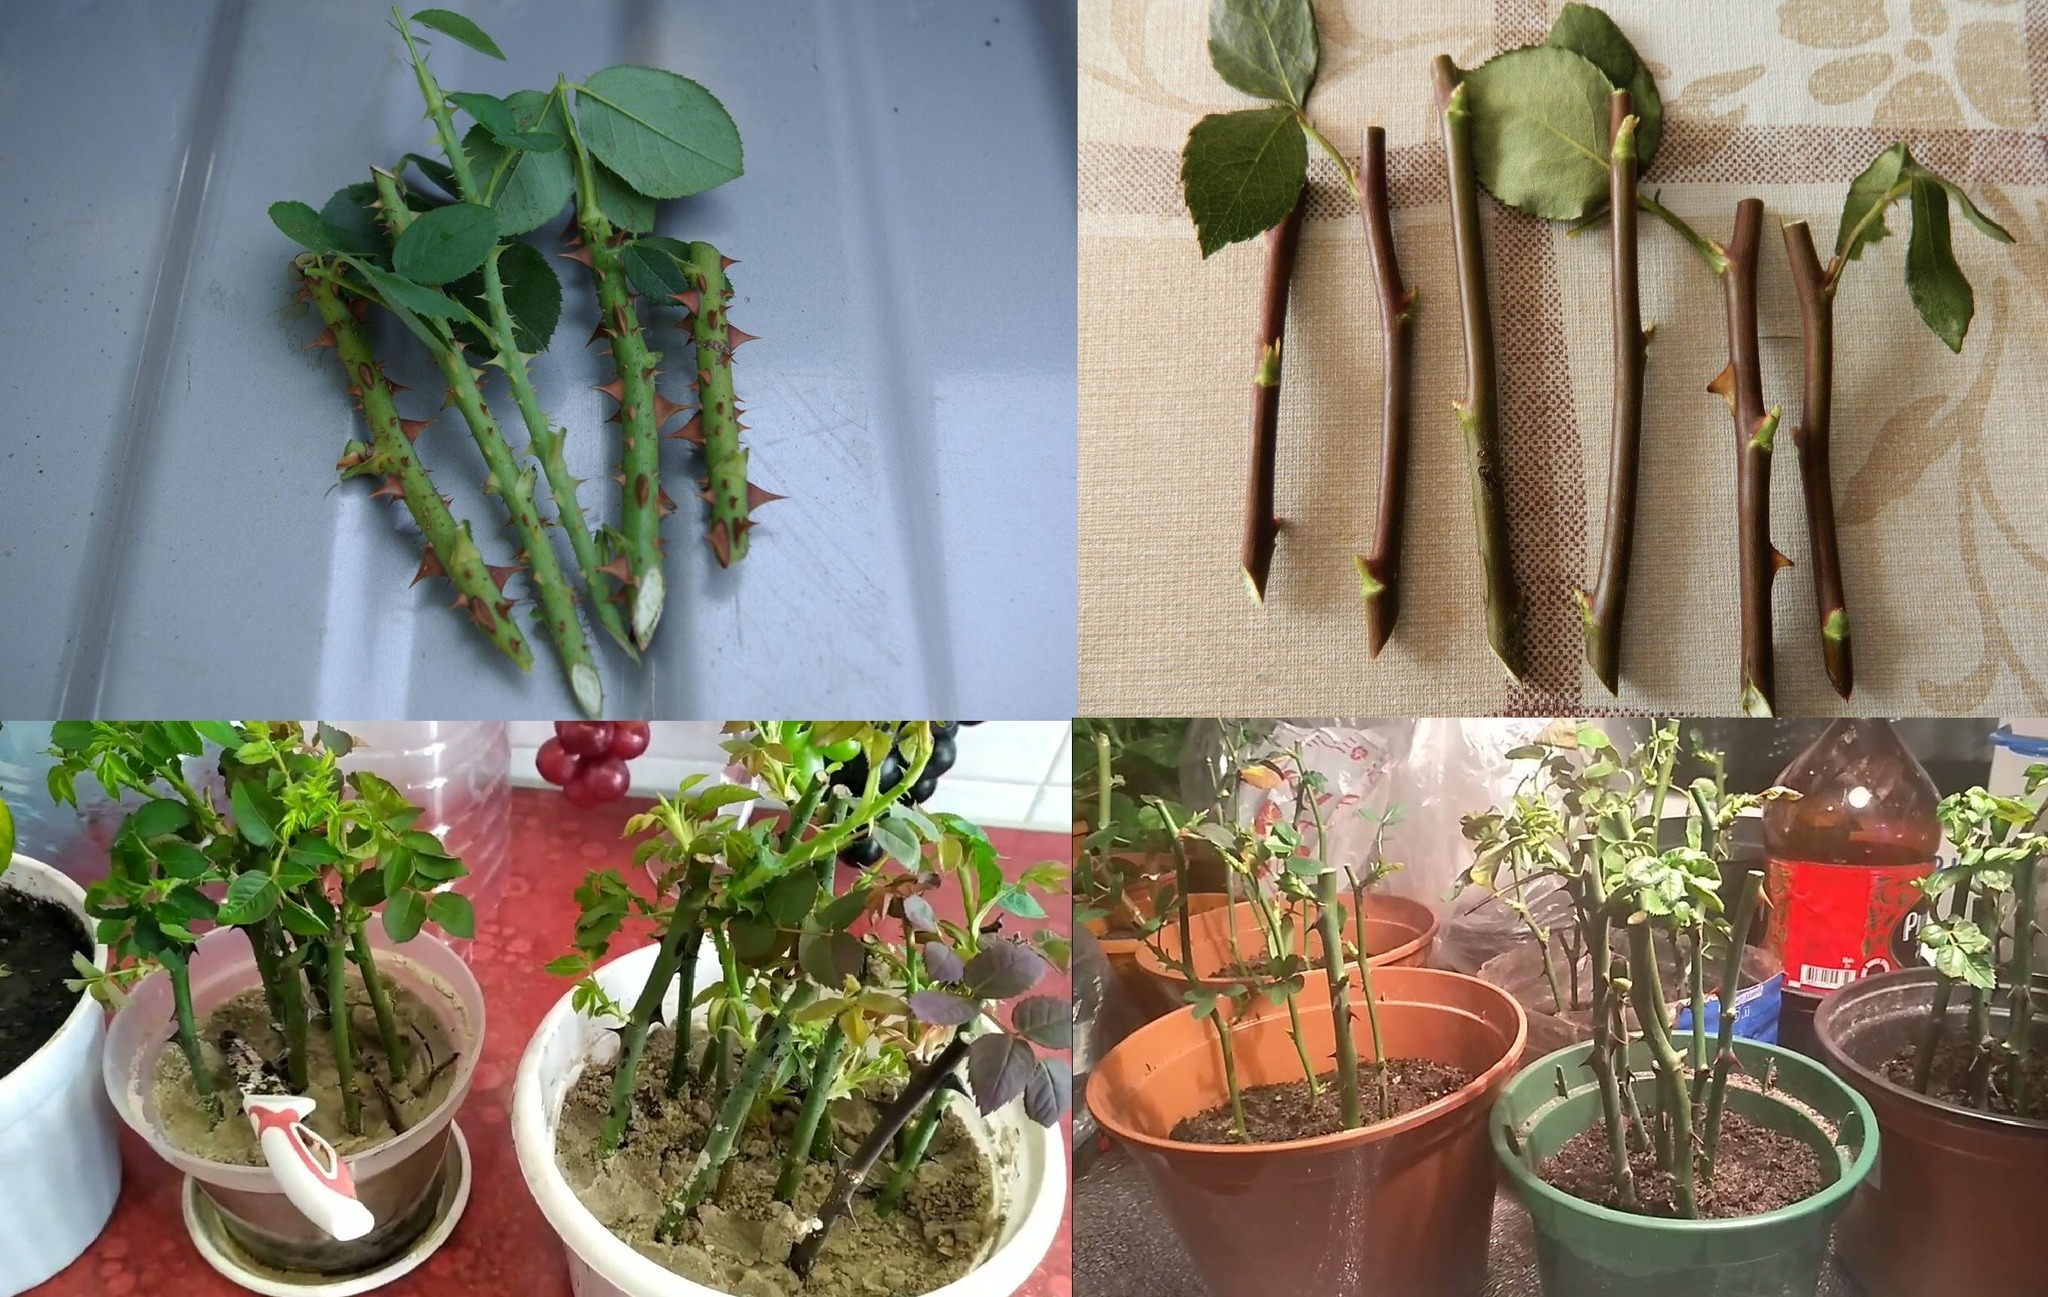
- Choose healthy, disease-free rose stems for propagation. Look for stems that are green and firm, preferably with several leaf nodes.
- Opt for semi-hardwood cuttings, which are taken from the current season’s growth and are more likely to root successfully.
Step 2: Preparing the Cuttings
- Using sharp, clean pruning shears, cut a 6-8 inch stem from a healthy rose bush at a 45-degree angle, just below a leaf node.
- Remove any flowers or buds from the stem, as they can divert energy away from root development.
- Trim the stem to remove any excess leaves, leaving only 2-3 leaves at the top.
Step 3: Rooting Hormone (Optional)
- Dip the cut end of each rose cutting into a rooting hormone powder or gel, which can help stimulate root growth and increase the chances of successful propagation. This step is optional but can improve results, especially for difficult-to-root varieties.
Step 4: Planting the Cuttings
- Fill small pots or containers with a well-draining potting mix or a mixture of perlite and peat moss.
- Make a hole in the soil with a pencil or stick, then insert the prepared rose cuttings into the hole, burying them about halfway deep.
- Firmly press the soil around the base of each cutting to ensure good contact and stability.
Step 5: Providing Ideal Growing Conditions
- Place the pots in a warm, bright location with indirect sunlight. Avoid placing them in direct sunlight, as this can cause the soil to dry out too quickly.
- Keep the soil consistently moist but not waterlogged. Use a spray bottle or watering can to water the cuttings gently, ensuring that the soil remains damp.
- Consider covering the pots with a clear plastic bag or plastic wrap to create a mini greenhouse effect, which helps retain moisture and create a humid environment conducive to root development.
Step 6: Monitoring and Patience
- Check the cuttings regularly for signs of new growth, such as emerging leaves or roots. This process can take several weeks to several months, so be patient and continue to provide care and attention.
- Once the cuttings have developed a healthy root system and new growth, they can be transplanted into larger pots or directly into the garden.
With proper care and patience, you’ll soon be rewarded with a collection of beautiful rose bushes grown from cuttings, ready to adorn your garden with their breathtaking blooms and enchanting fragrance. So why not give it a try and embark on your own rose-growing adventure? Happy gardening!
Share Article: