
Nail fungus can be a persistent and annoying problem, but there’s a natural remedy that might just do the trick: celandine. This plant, often found growing wild, has been used for centuries for its medicinal properties. Making an ointment from celandine is a simple and effective way to treat nail fungus. Here’s how you can make this miracle ointment at home and enjoy healthy, clear nails.
Why Celandine?
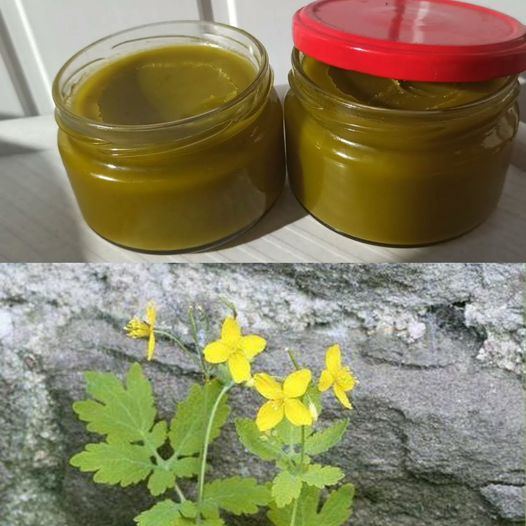
Celandine, also known as Chelidonium majus, is renowned for its antifungal, antibacterial, and antiviral properties. Its bright yellow sap contains powerful compounds that can help combat infections, making it an excellent natural remedy for nail fungus.
Ingredients You’ll Need
-
Fresh celandine leaves and stems
-
Olive oil or coconut oil
-
Beeswax (optional, for a thicker consistency)
-
A clean jar with a tight-fitting lid
How to Make Celandine Ointment
1. Harvest the Celandine:
-
Find fresh celandine leaves and stems. Be sure to wear gloves when handling the plant, as its sap can be irritating to the skin.
-
Rinse the leaves and stems thoroughly to remove any dirt.
2. Prepare the Oil Infusion:
-
Chop the celandine leaves and stems into small pieces.
-
Place the chopped celandine into a clean, dry jar.
-
Pour olive oil or coconut oil over the celandine until it is completely covered.
-
Seal the jar tightly and place it in a sunny spot for 2-3 weeks. Shake the jar gently every few days to help with the infusion process.
3. Strain the Oil:
-
After 2-3 weeks, strain the oil through a fine mesh sieve or cheesecloth into a clean container. Discard the plant material.
4. Optional: Add Beeswax:
-
If you prefer a thicker ointment, melt a small amount of beeswax in a double boiler.
-
Once melted, slowly add the infused oil to the beeswax, stirring continuously until well combined.
-
Pour the mixture into a clean jar and let it cool and solidify.
How to Use the Ointment
-
Clean Your Nails:
-
Start by cleaning and drying your nails thoroughly. This ensures that the ointment can penetrate effectively.
-
-
Apply the Ointment:
-
Using a clean cotton swab or your fingers, apply a small amount of the celandine ointment to the affected nails. Be sure to cover the entire nail and surrounding skin.
-
-
Massage In:
-
Gently massage the ointment into your nails and skin. This helps improve circulation and allows the active compounds to reach deeper layers.
-
-
Repeat Daily:
-
For best results, apply the ointment twice daily, once in the morning and once before bed. Consistency is key to combating nail fungus effectively.
-
Benefits of Celandine Ointment
-
Antifungal Properties: Celandine’s natural compounds help kill the fungus causing the infection.
-
Soothing and Healing: The ointment not only fights fungus but also soothes the skin and promotes healing.
-
Natural and Safe: This homemade ointment is free from harsh chemicals and artificial ingredients.
Conclusion
Nail fungus can be stubborn, but with this simple, natural celandine ointment, you can tackle it effectively. The antifungal properties of celandine, combined with the nourishing benefits of olive or coconut oil, create a powerful remedy that’s easy to make and use. Give this miracle ointment a try and enjoy healthier, clearer nails in no time!