Revitalize Your Dehydrated Orchid: A Step-by-Step Guide
For flower enthusiasts facing the distressing sight of an orchid with dehydrated roots and potential rot, despair not—there’s hope for revival. Assess the orchid’s leaves: are they slightly wrinkled and soft to the touch? If so, intervention is imperative.

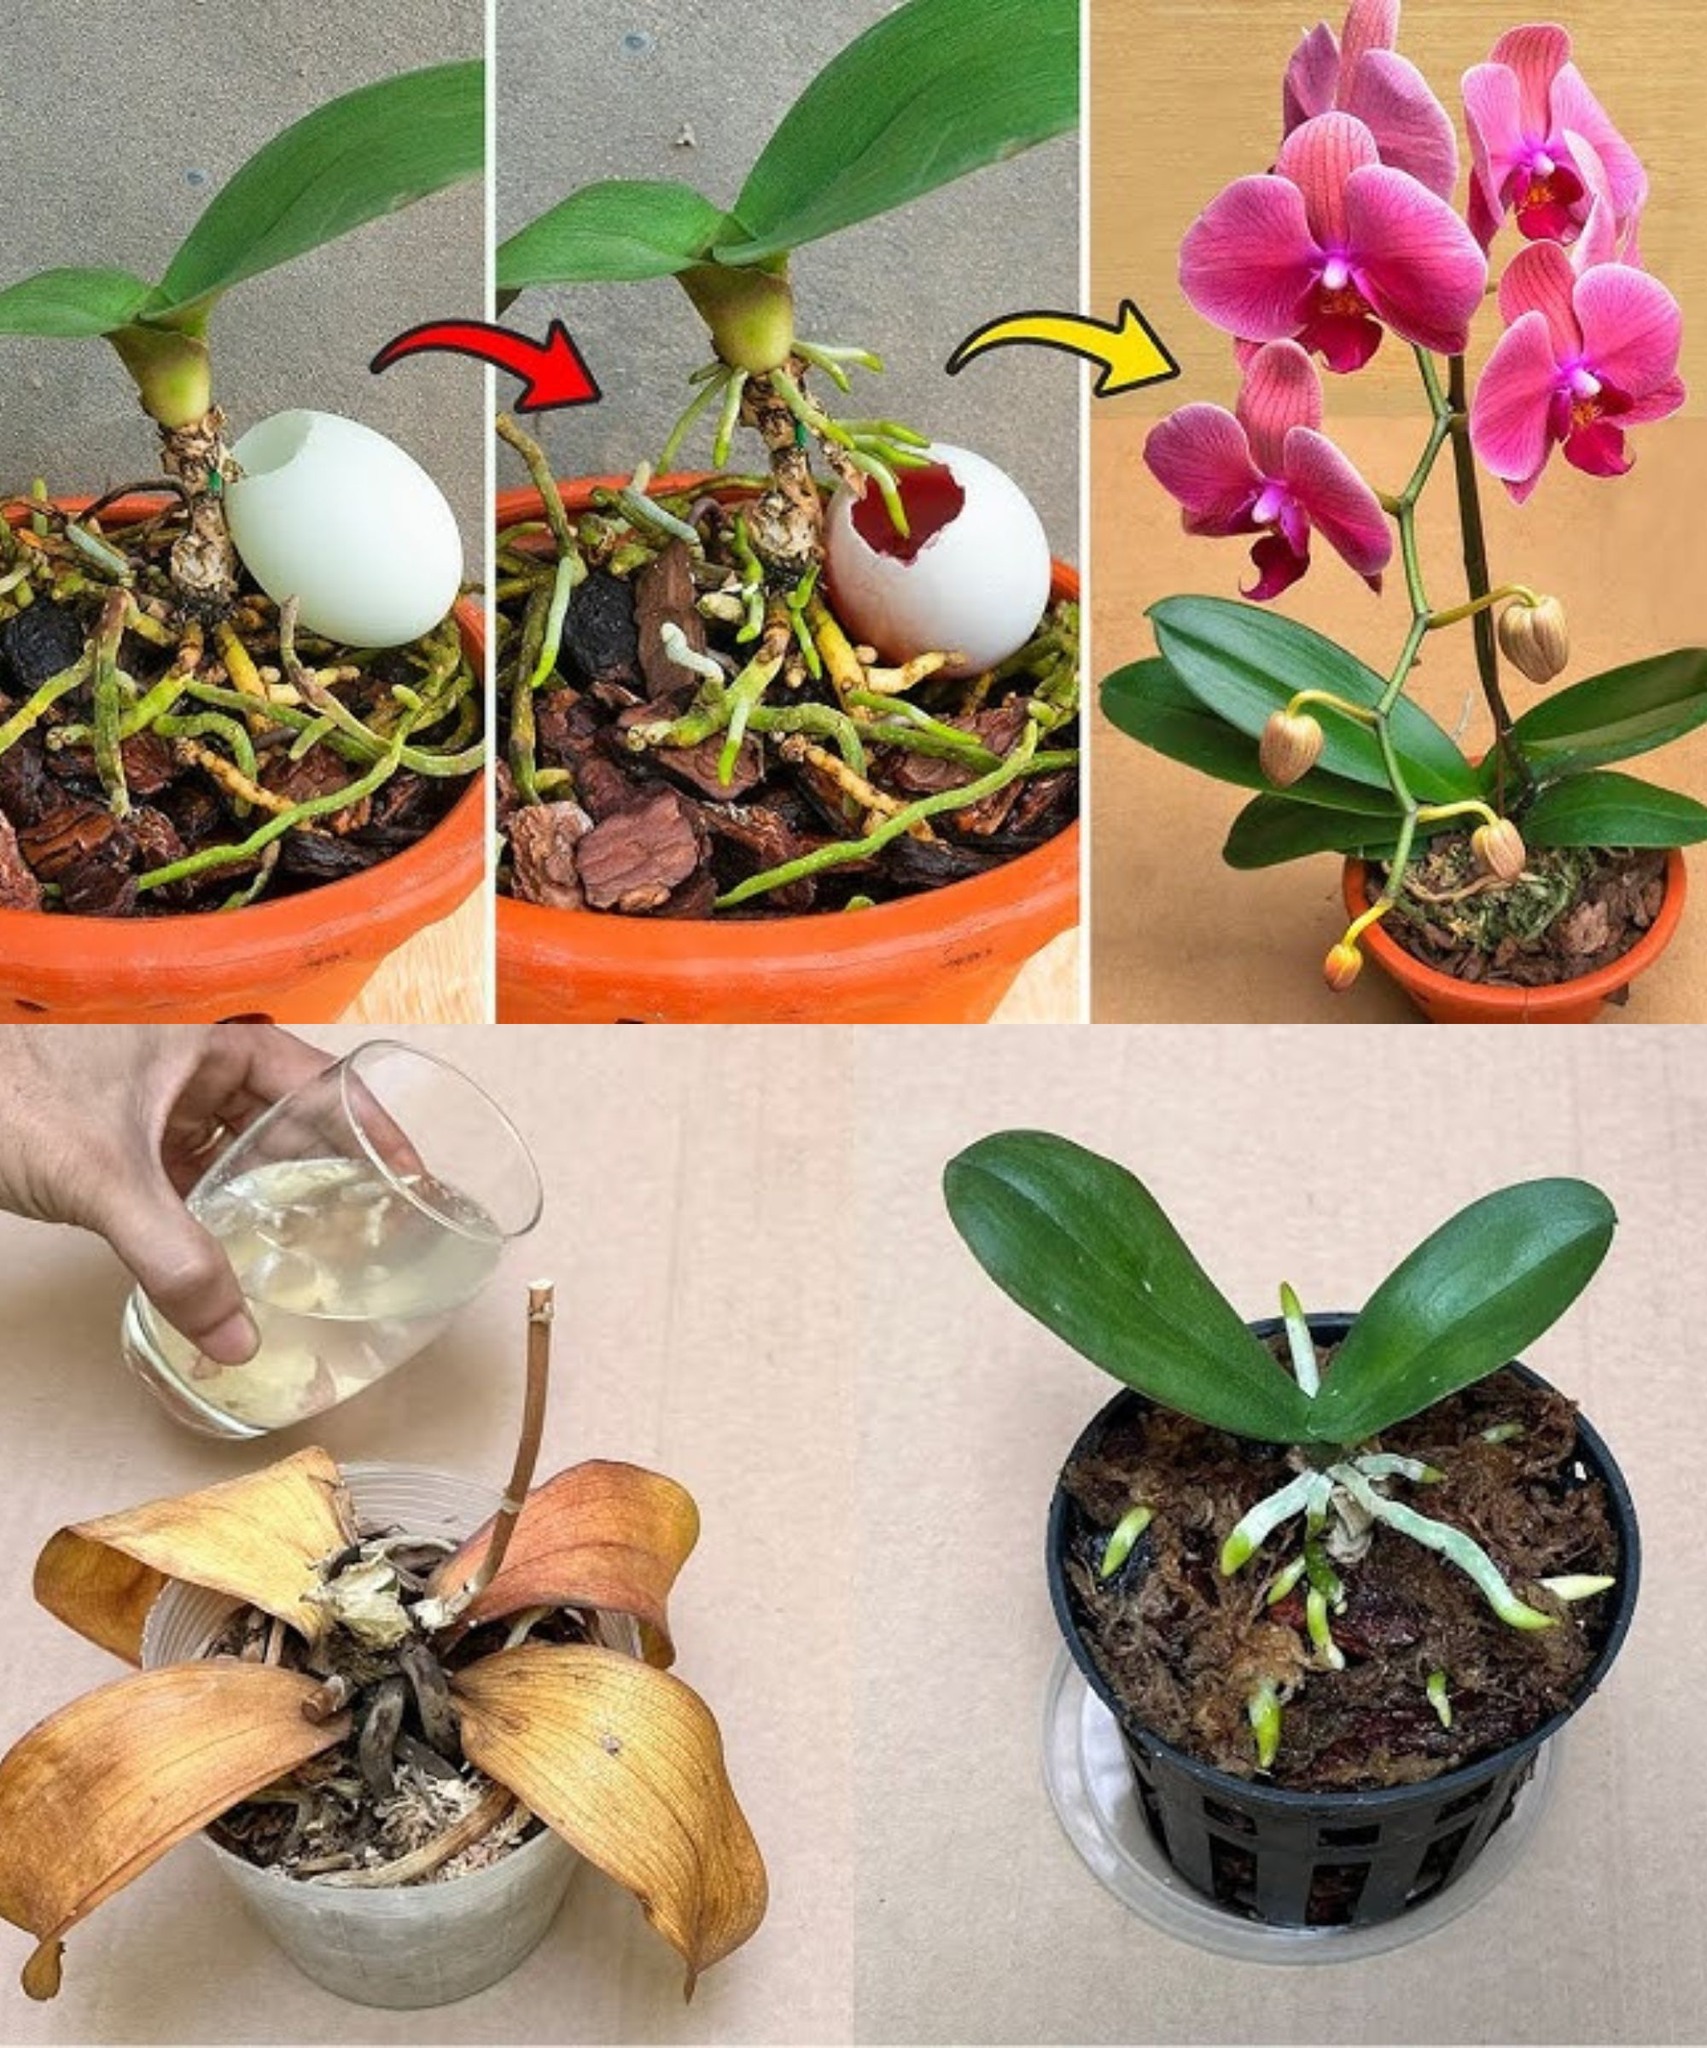
- Root Examination: Unveiling the Orchid’s Health Start by inspecting the roots beneath the soil. Rotten or completely dry roots indicate inadequate nourishment, putting the orchid’s survival at risk. However, the journey towards rejuvenation begins here.
- Hydrotherapy: A Lifeline for Your Orchid
- Remove the orchid from its soil entirely.
- Eliminate rotten roots, ensuring only healthy, fleshy roots remain—a crucial foundation for rehabilitation.
- Secure a chalice-type glass, approximately 10-15 cm high, for the hydrotherapy process.
- Immerse the roots in water throughout the day, removing them at night. This prevents overhydration while granting the orchid vital hydration without risking root rot.
- Sustain this hydrotherapy regimen for a week, observing the gradual revitalization of your orchid’s leaves.
- Repotting for Continued Vitality With newfound vigor in your orchid, it’s time to transition it back to its pot.
- Acquire expanded clay for the saucer to facilitate ongoing hydrotherapy and proper drainage.
- Refill the pot with soil, strategically placing the orchid and covering its roots.
- Ensure the orchid stands upright during repotting, enhancing its robust appearance and optimizing water absorption.
By following these rejuvenating steps, you’ll witness your once-dehydrated orchid thriving anew. With care and commitment, rescue your beloved orchid from the brink, allowing it to bloom with vitality once more.